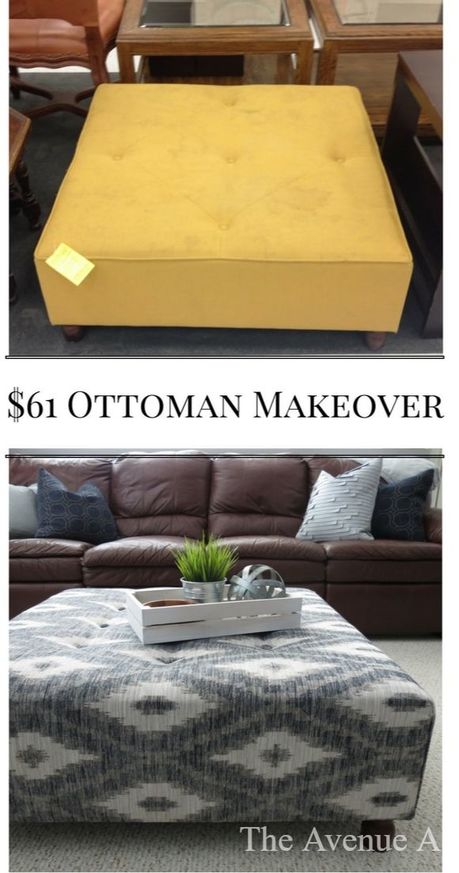
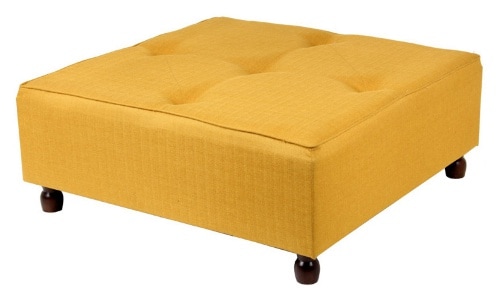
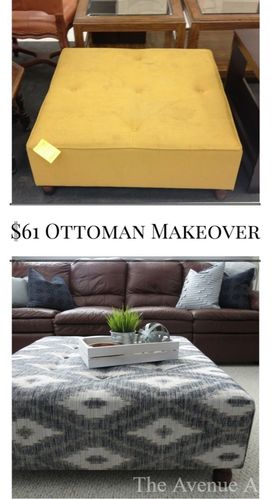
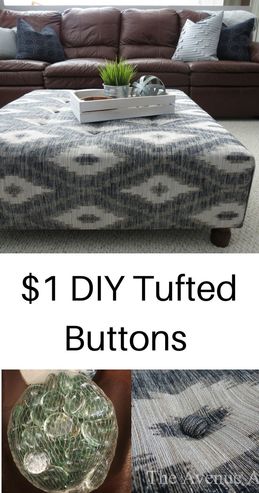
 It is finished!!! This is the fastest I have redone a piece of furniture from start to finish. (That's sad I don't get my projects done faster since this sat in my garage for 2 weeks! But I'm working on being better about that. 😀) The project turned out so nice compared to what it was before! Keep reading to see how I made tufted buttons for only $1 (and I'm not talkin' about $1 per button). Like so many other things I own I got this $20 ottoman from a thrift store (you can check out my post on finding this and other thrift store items here)! As you can see the ottoman is pretty large and has a lot of stains; so it definitely needs to be reupholstered. 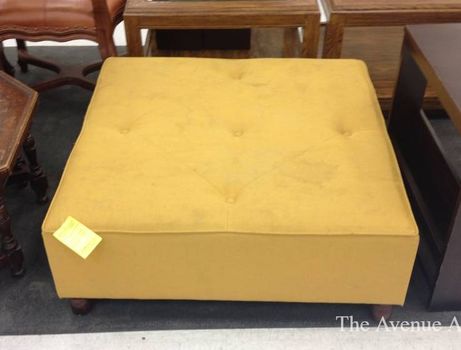 This is the tag from the under side. The official name is Privilege Gold Square Ottoman. I found it on few different websites. Here's the ottoman on Hayfield website for $487 brand new!!!!! I wouldn't pay that much for this ottoman when you can redo one from a thrift store for under $100.
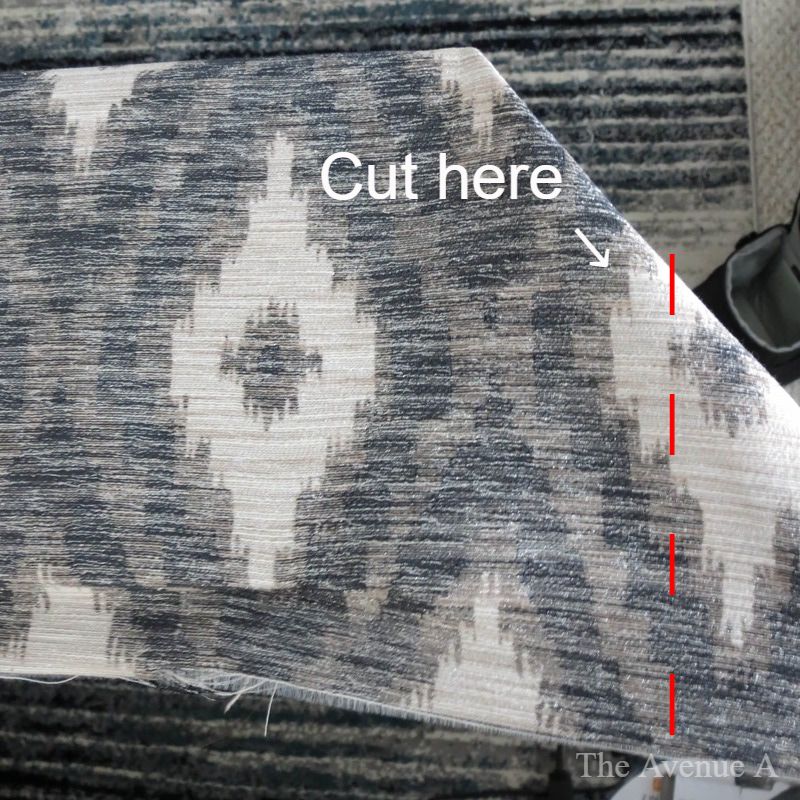
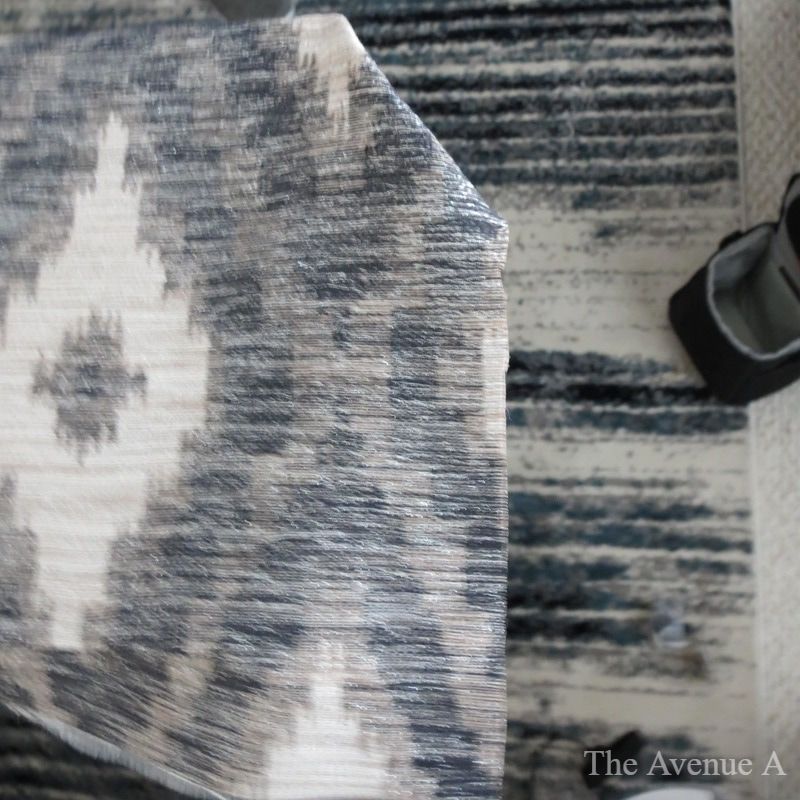
1. Decide where to redo itSince I live in Utah and it is winter right now, there was no way I was going to do this in the garage. It is literally freezing outside and in the garage, but the ottoman is pretty dirty. So I ended up laying out plastic tarps for painting and set the ottoman top of them inside the house. So find a comfortable space that you can layout your fabric and ottoman without getting your new fabric dirty. 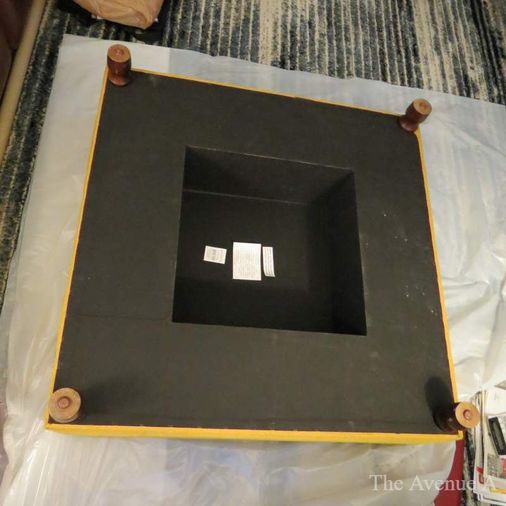 2. Remove LegsAfter I laid down the tarp I turned the ottoman upside down and unscrewed the legs. If you are going to paint or stain the legs you probably want to start on that soon since the reupholstering part is pretty fast. 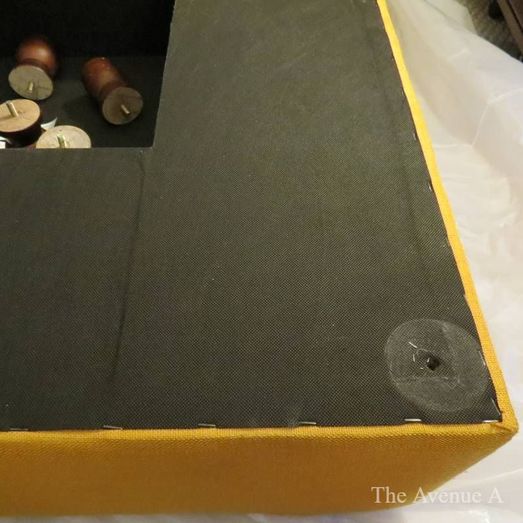 3. Remove old fabricI cut off all the old fabric. Before you cut the fabric think about how you are going to recover it. If you need to sew a cover make sure you cut off your fabric carefully so you can make a pattern out of it. I originally was planning on sewing a cover but found fabric wide enough to completely cover the tops and sides without having to sew!! I was pretty happy I could save some time and make this project less complicated.
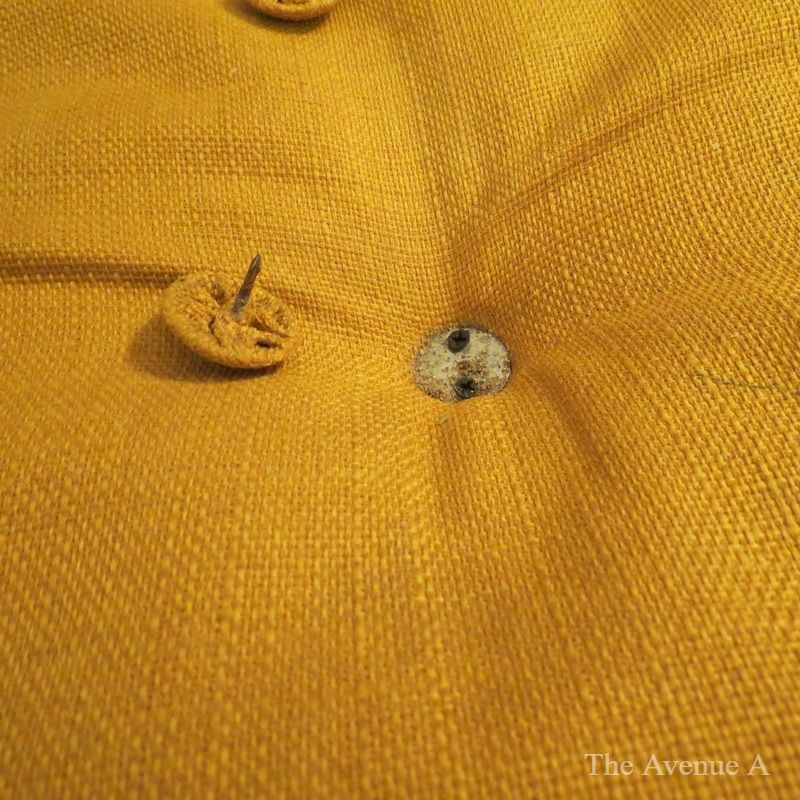
 4. Remove any Old buttons
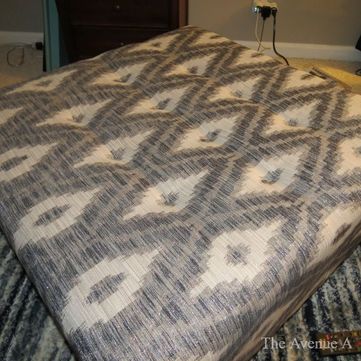
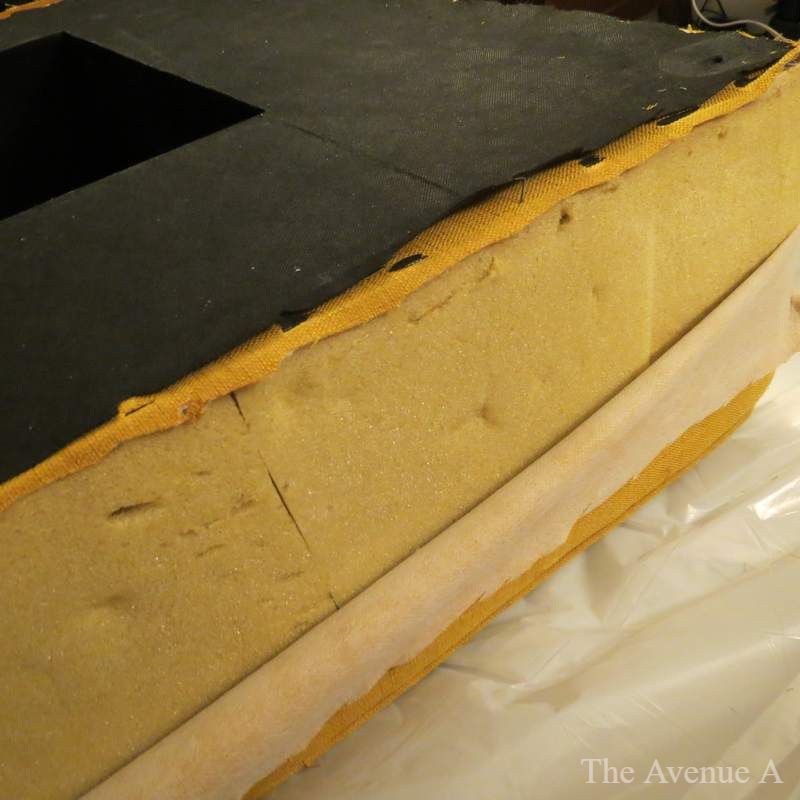
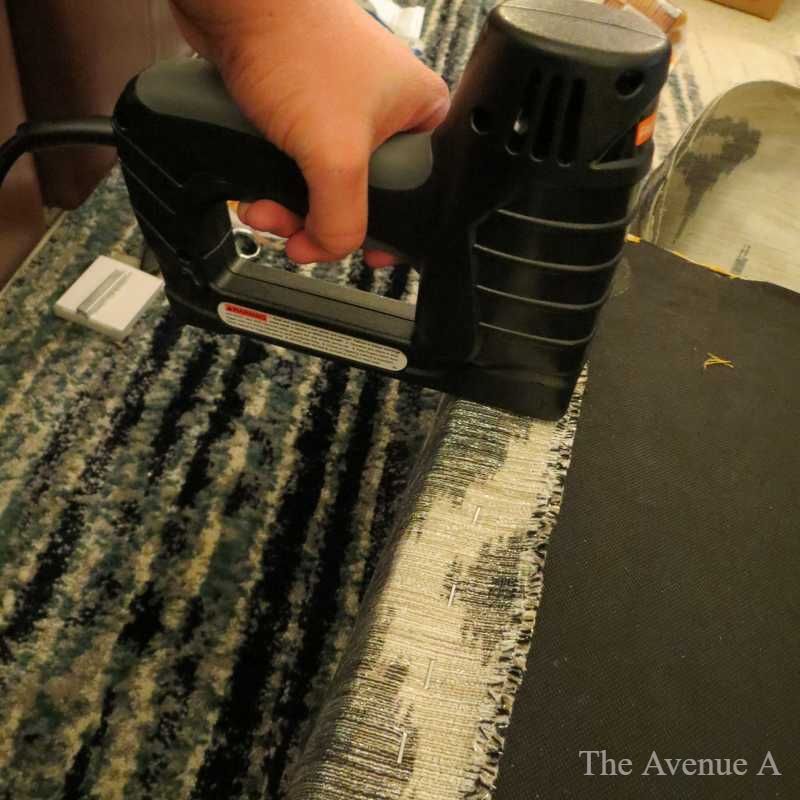
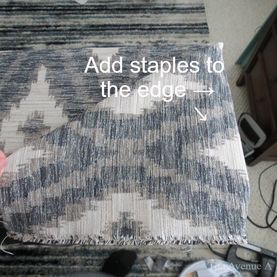
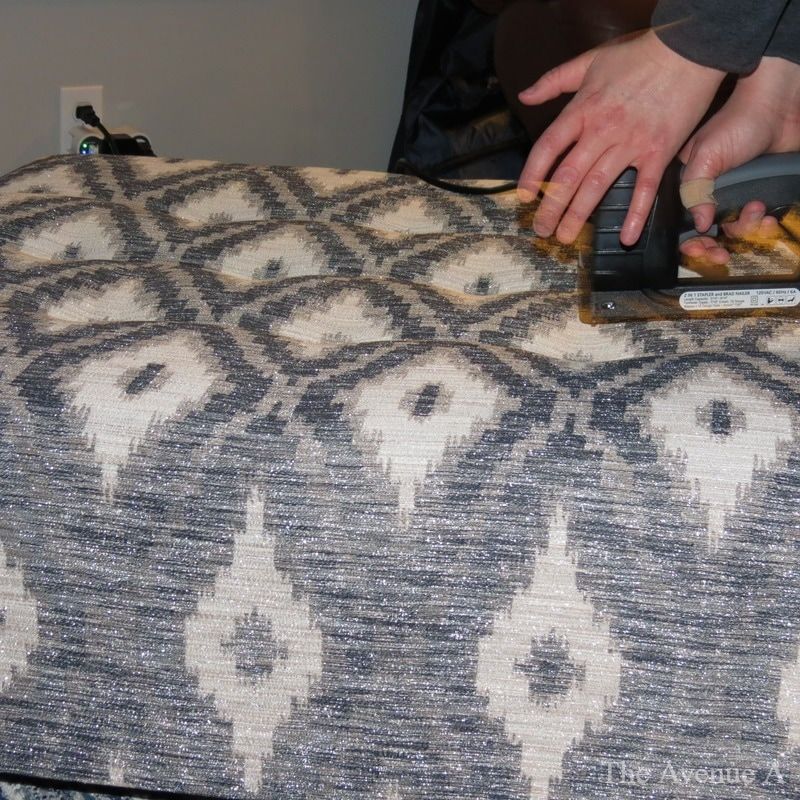
5. Add or replace foamIf the foam or padding on your ottoman is broken down you can easily replace it. Joann's, Micheal's and even Lowe's sell a lot of different foams and batting that you can use. The foam on this ottoman was fine, I considered adding more foam but ended up not. The foam was loose and moving around so I used hot glue to hold it in place. You can also use spray adhesive. 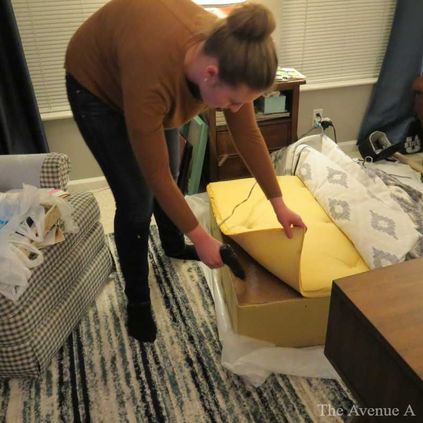 6. Measuring the FabricI ended up buying an even 2 yards of upholstering fabric from Joann's, it was on sale for 50% off. Joann's also has a $10 off $35 purchase or more, so the total for 2 yards was $40. This fabric was pretty expensive at $50 a yard but it has a metallic silver threads woven through it. We laid the fabric down and then centered the ottoman on top. There was not a lot of extra fabric so we decide trim the edges after we stapled it. If you are sewing a cover then you can skip the next couple steps.  7. Attach the fabric to the ottomanI got this awesome Stapler/Nail gun as a gift. I believe that it is from Harbor Freight. What I like about this is that you can you nails and staples. Also you can use a couple different staple sizes, so you can use this for a lot of projects. After you have the fabric centered to where you want it, check to make sure your fabric covers all the sides completely. I then stapled the two sides across from each other, pulling it tight as we went. DON'T STAPLE ALL THE WAY TO THE CORNERS! LEAVE A COUPLE INCHES TO DO THE CORNERS!!! We then did the other two sides still pulling the fabric really tight. Again don't staple around the corners! 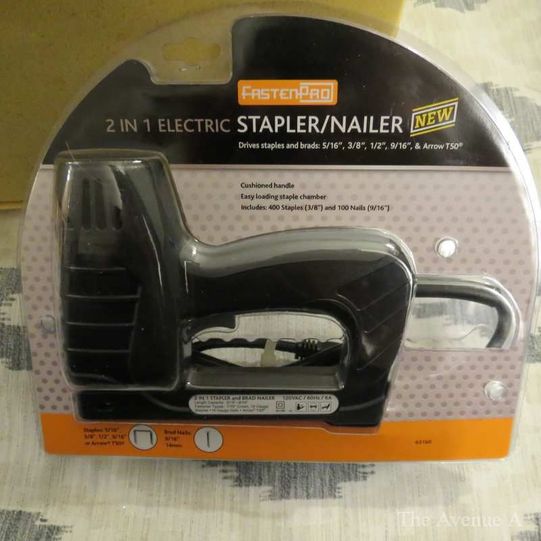
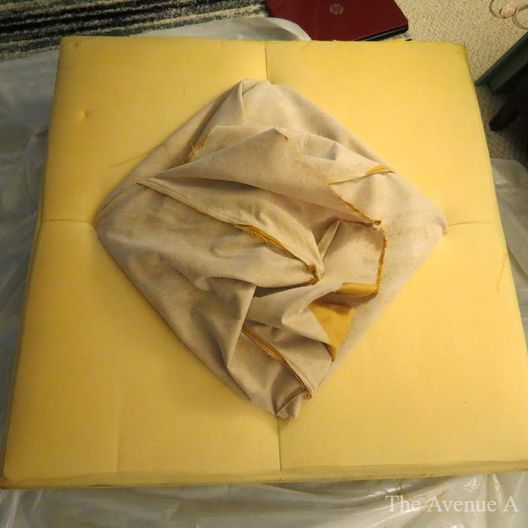
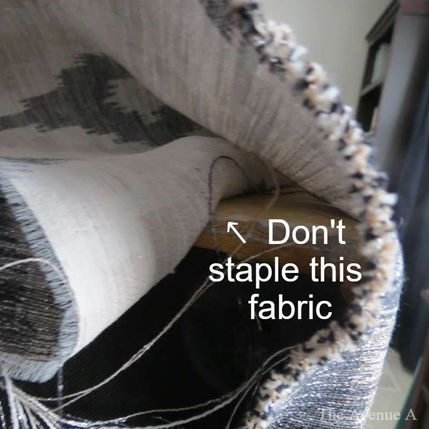
8. Making Professional CornersI watched a lot of videos on how to make corners look professional. Ultimately I took bits and pieces from each video to do mine. So, the first step is to gather the extra fabric to one side creating a triangularly shape (see picture below). Next, we are going to staple 1 inch from the edge making sure not to staple the fabric under the fold.
 If you did the last steps right you should be able to pull the fabric the other direction hiding the staples you just did. (see picture below)
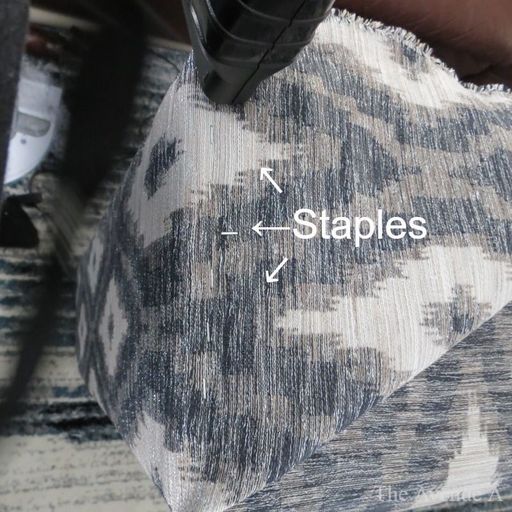
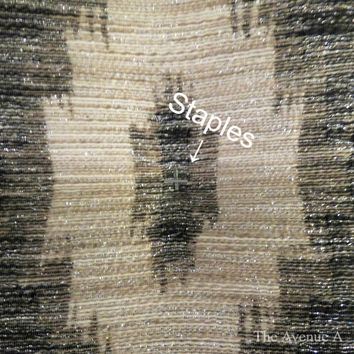
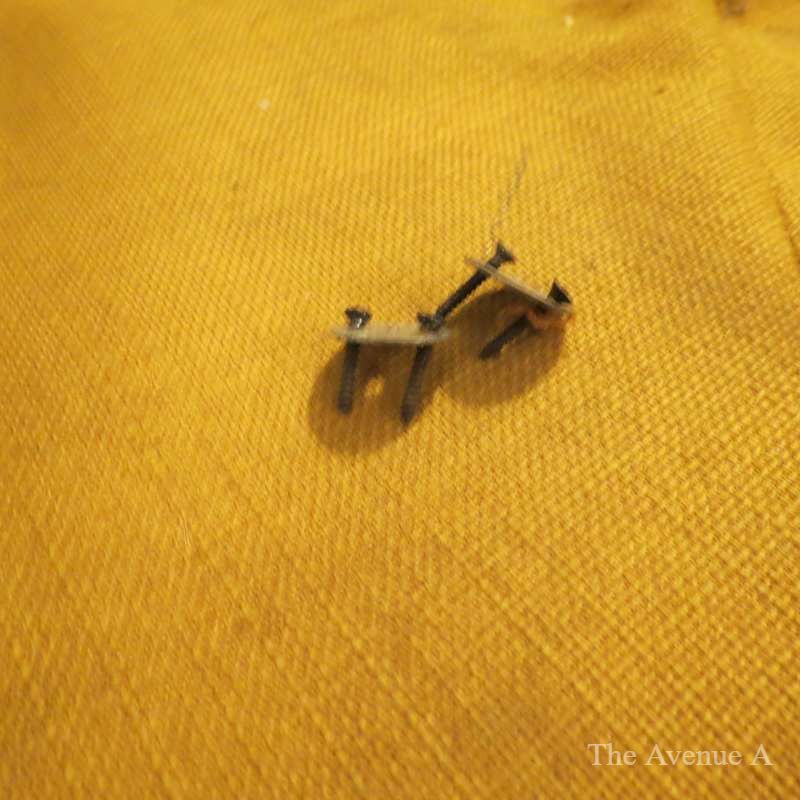
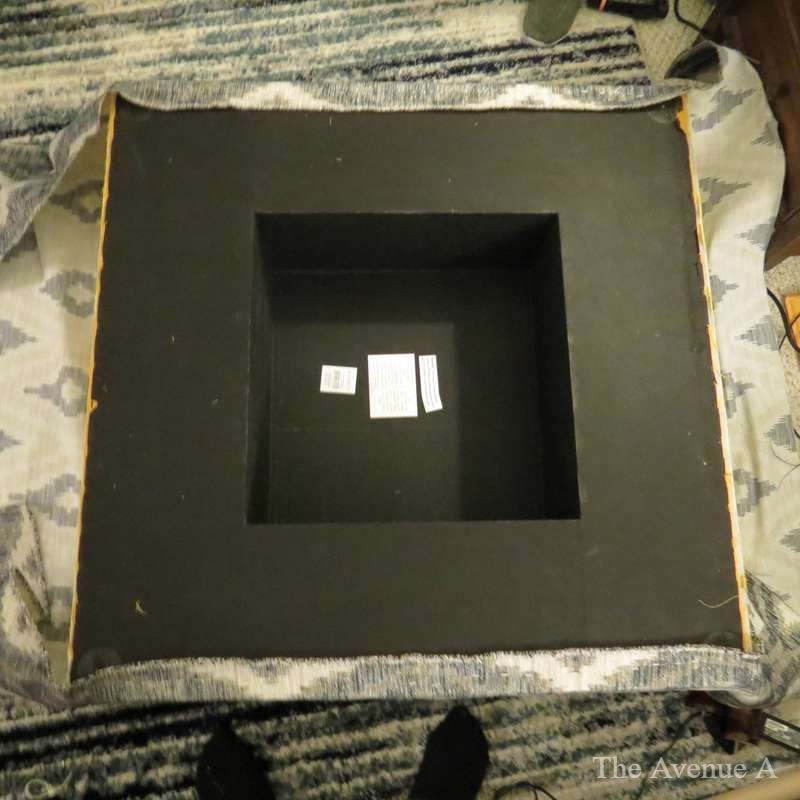
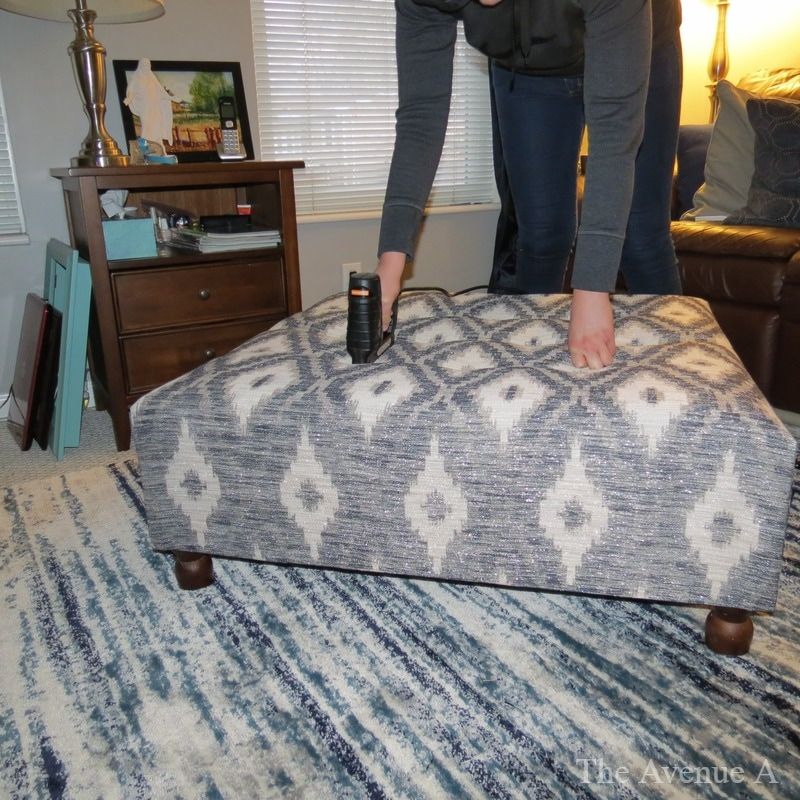
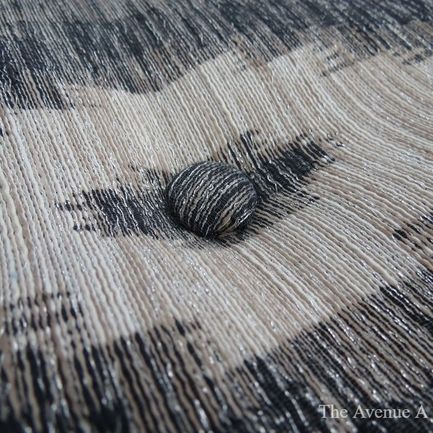
Now pull the fabric back so that you can see the staples again. Cut just the fabric next to staples. Make sure to leave a couple inches from the top. 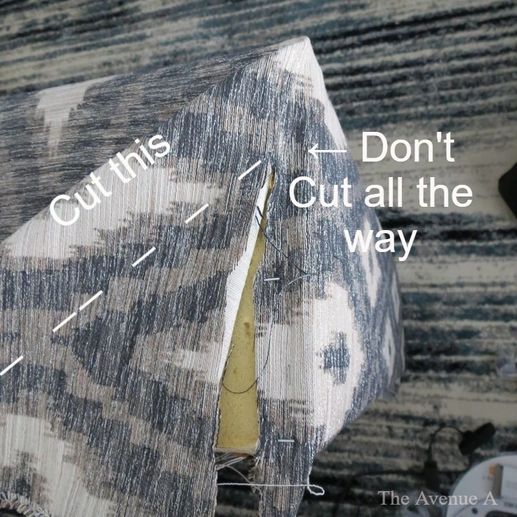 Now you have cut away all the bulk, pull the fabric to cover the staples. Fold the fabric so it lines up with the edge and doesn't go over. Pull tight and tape the bottom of the ottoman to hide the staples. I put a line of hot glue between the two pieces of fabric to keep the edge crisp and from coming undone. 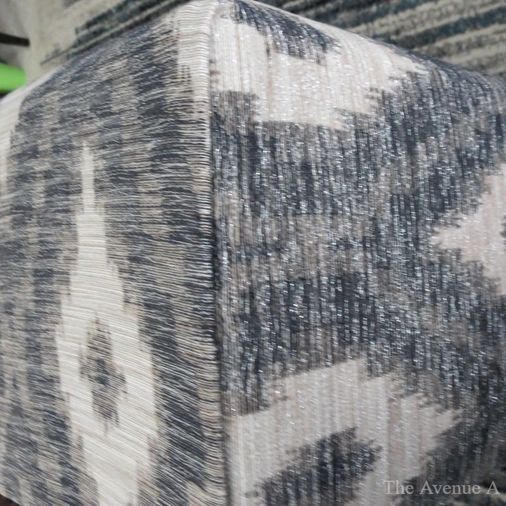 9. Make the buttons for the tufts!!This is such an easy step compared to making the corners! I just took the staple gun (which I used earlier) and used 2 staples while pushing down on the fabric were I wanted the tufts to go. staple each spot making an x or t shape. Since the fabric I used is an ikat (that's the name of the design on this fabric) I put 2 staples in the center of an ikat. If you are not using a fabric with a pattern I would recommend measuring and marking where you want the tufts to go. This easy trick will work for thick or thin foam. If you are using thick foam you will need a washer (to keep the fabric from ripping) and a screw (if you use really thick foam you might need to cut out a little foam where you are going to screw to keep the density down).
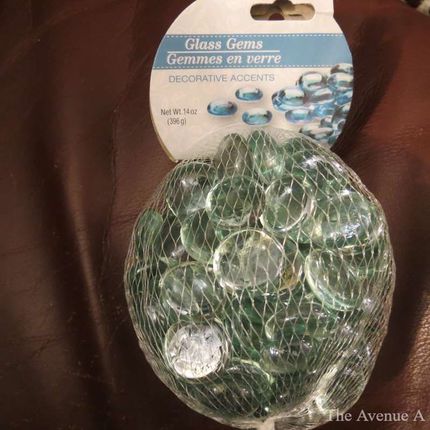
  9. Making all the buttons for $1!!!Okay this tip is even better than the last! Use the Glass Gems from Dollar Tree for $1! You get a whole bag (so I have enough for many projects). This is the medium size gems. They have a smaller and larger ones. I just covered them with fabric attaching it with hot glue. Once I had them all covered I just glued them on top of the staples from the last step. This is a lot easier than having to sew on buttons like the traditional tufting method.
Amazing how good they look and for only $1!!! Sorry I'm just so happy how I was able to make the buttons for so cheap! You are done! Enjoy your work!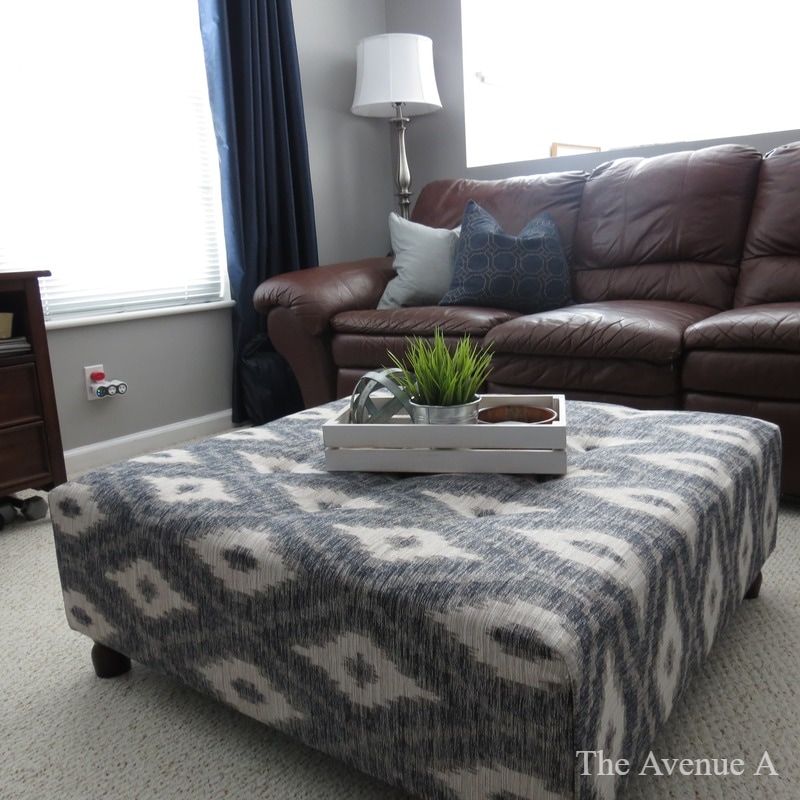 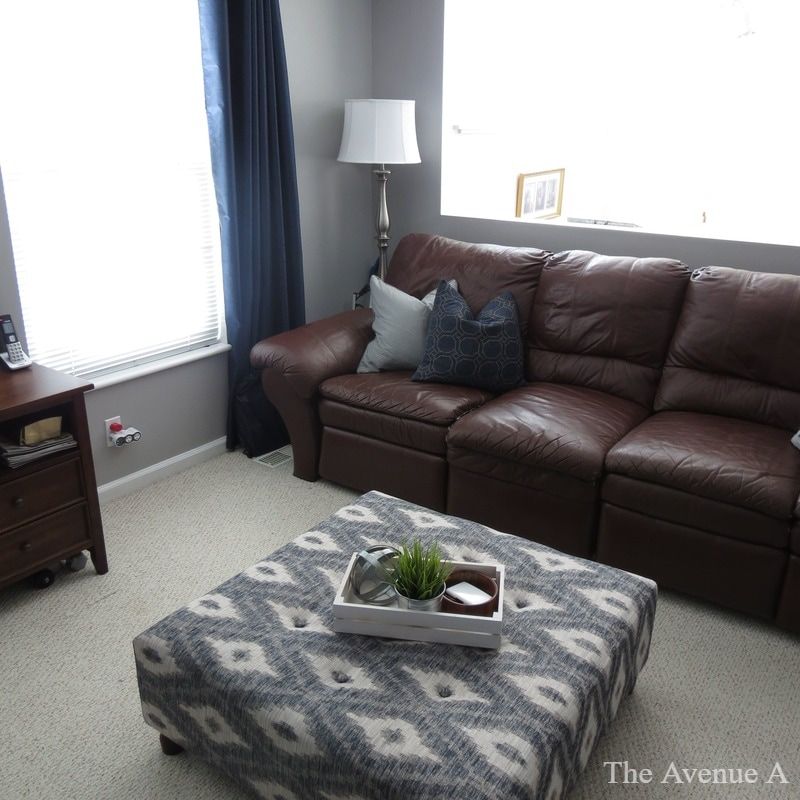
Have you even reupholstered an ottoman? I'd love to hear from you!
- Addison
0 Comments
Leave a Reply. |

Hey I'm Addison! I'm 19 and going to college. Passionate about DIY and Home Related projects for a low cost with expensive style! more→
Categories
All
Archives
April 2017
|


 RSS Feed
