 Its been awhile since I gave you an update on the accent wall I have been doing in my bedroom. So lets see what I ended up with for how many columns and rows. If my first love is grass cloth then my second love is wainscoting. I have learned so much doing this accent wall. It has been a hard project but here is what I have learned so far.
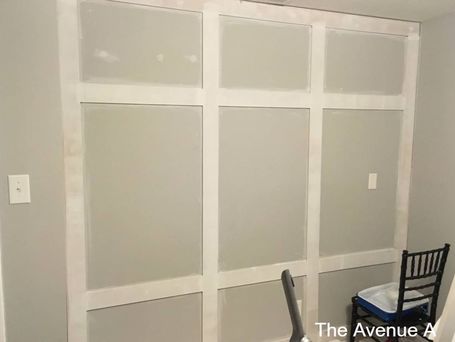
Wall Before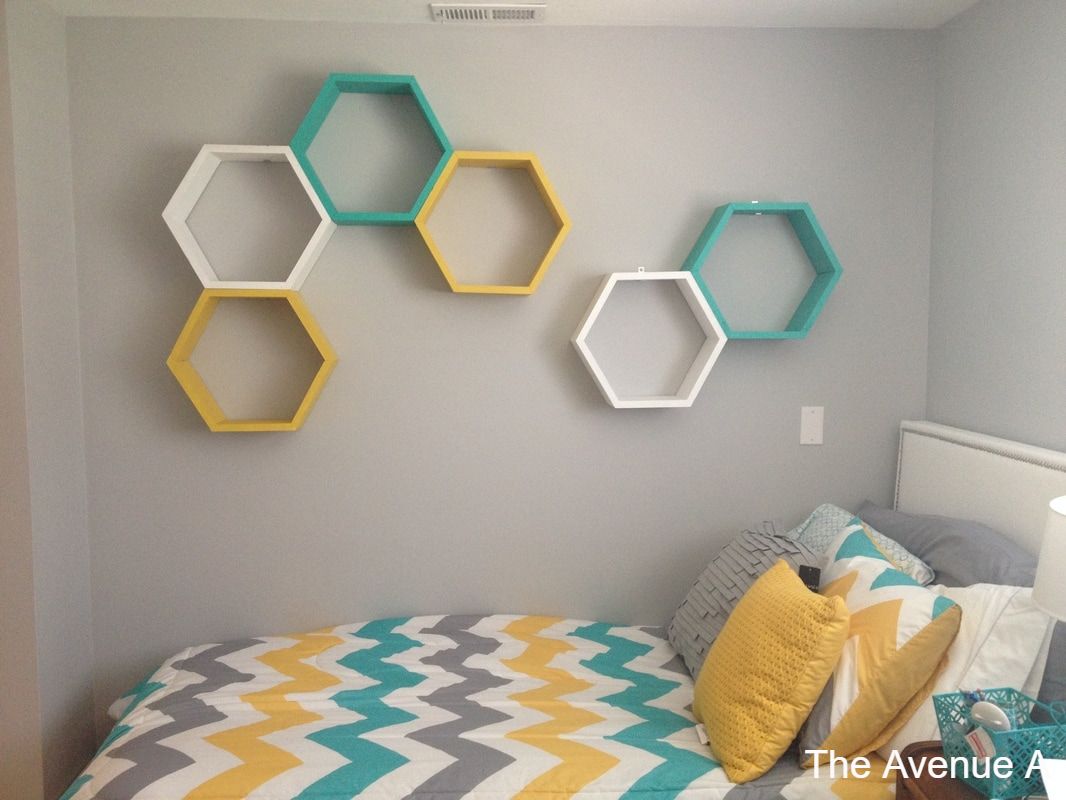 This is what the wall looked like 3 months ago. I ended up taking down the hexagon shelves and patching the holes and just spot painting the patches. That was fine for a while but in the end I wanted to do something with the part of the room. I have been loving wainscoting a lot lately and been looking for the perfect spot to do a whole wall of it. After Measuring again and again I finally decided that 4 columns was to much. That many columns put the boards to close together. I also decided on just 3 rows for the same reason. I felt when I put more columns and rows that it look kinda cheap and tacky. One of many Ideas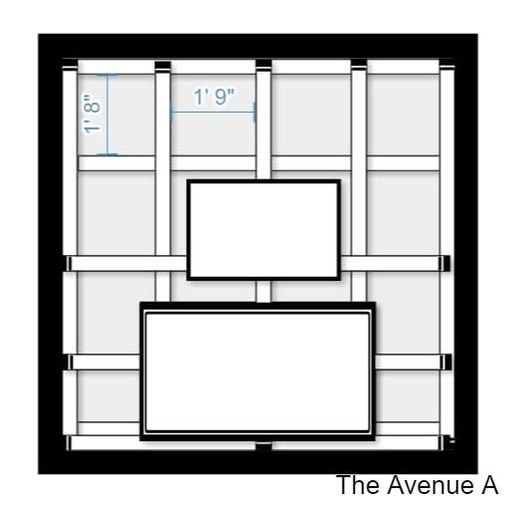 Final Plan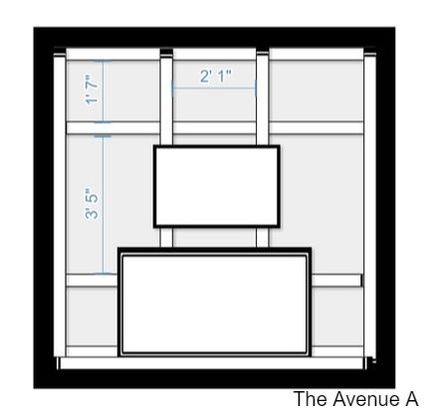 After I had the layout of the boards figured out I went to Home Depot and got a 4 ft by 8 ft MDF 1/2 board cut into 4 in wide strips. You can buy precut MDF board but it costs a lot more than buying a sheet and having it cut. The board costs less than $30 if you do the 1/2 to 1/4 in thick boards. After you have the boards cut you should prime them before you put them on the wall. Once they are on the wall it is harder to prime the side and MDF adsorbs a lot of paint so it takes a lot of coats. I didn't do this step but trust me you should. The weather was bad for a few days so I could paint them outside and I didn't want to wait. I used the chop saw to cut the boards to the right lengths and then an air compressor nail gun to attach them to the wall. I started with just the outside perimeter and then worked inwards. 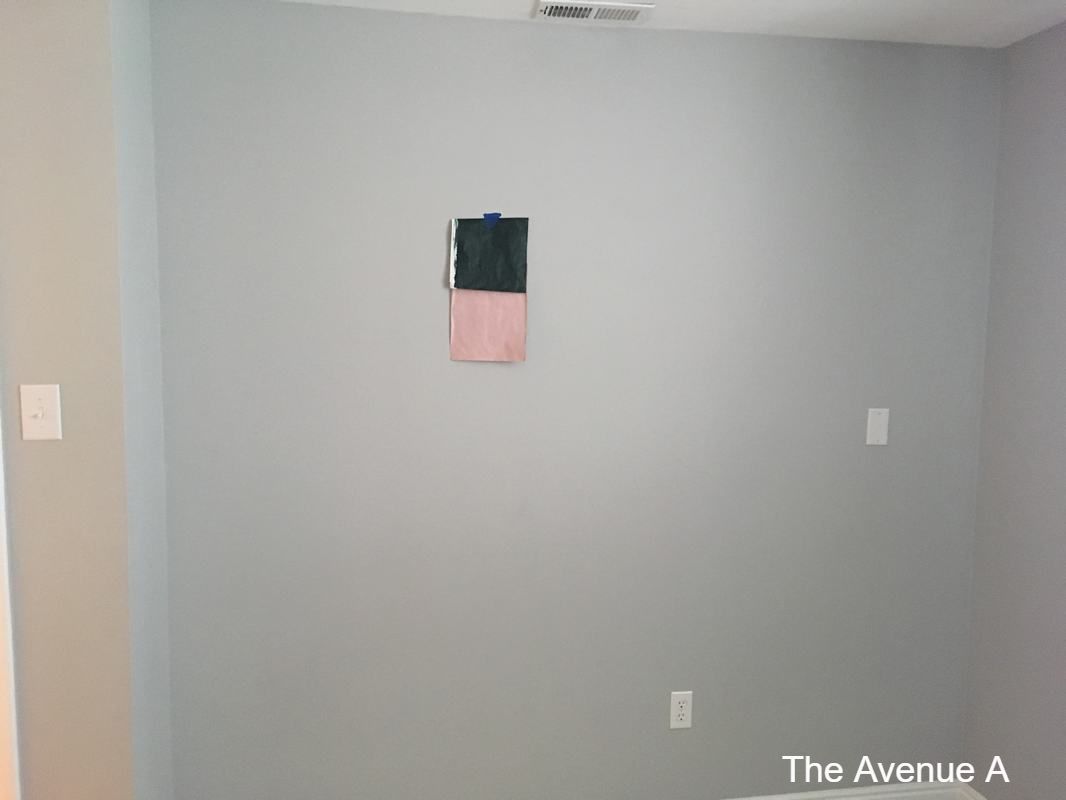 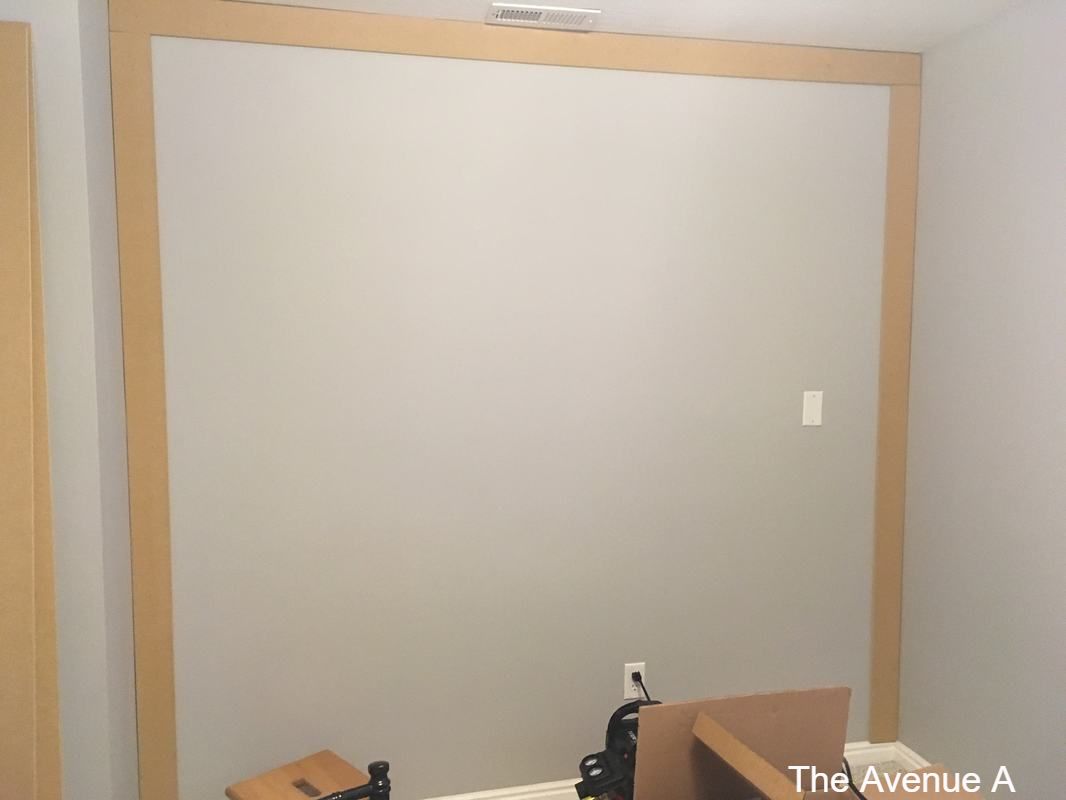 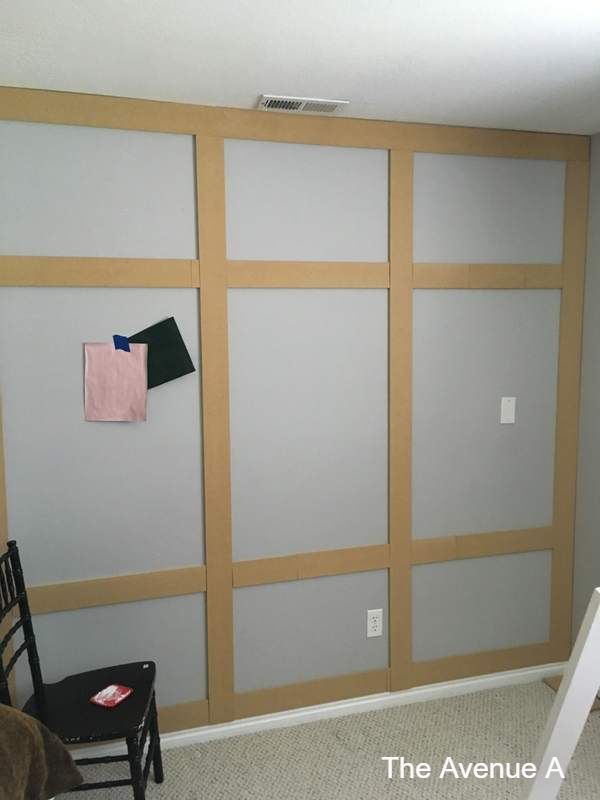 After I got all the boards up, I patched all the brad holes and where all the boards met. Then I sanded the boards and since I didn't prime the boards I primes them after I patched and sanded. 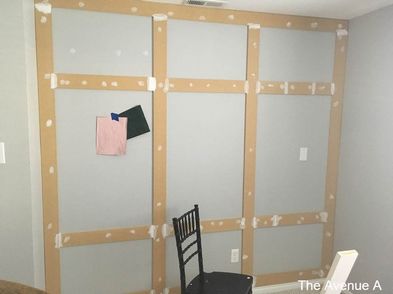 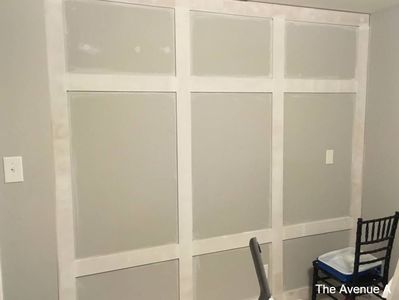 After the boards were all primed and patched I then caulked around all the boards. Make sure that you get paintable caulk.  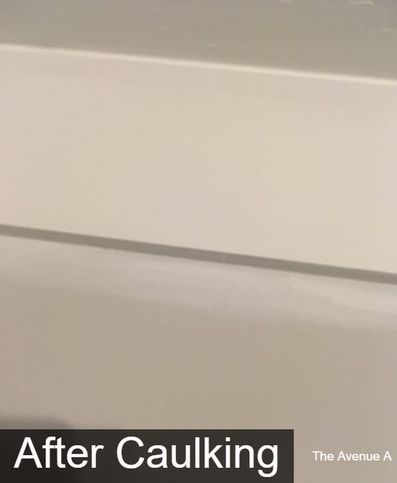 I'm going to stop here for today but hopeful by the end of next week I will have the big reveal up on the blog! It going to be a bold deep green wall!! All I can say is that it is looking so good and the room is finally coming together. Follow me on instagram at @theavenue_a for updates on this project and many more.
So what do you think of the project so far? -Addison
0 Comments
Leave a Reply. |

Hey I'm Addison! I'm 19 and going to college. Passionate about DIY and Home Related projects for a low cost with expensive style! more→
Categories
All
Archives
April 2017
|
 RSS Feed
